For those of you who have followed this blog from the beginning, you know that one of the first entries I did was a birthday cake I made for my son Keegan’s 3rd birthday. It was a full scale train cake, with track and engine. Well, Seeley, my youngest (whom we call Monkey) turns one this week, and was not about to be outdone!
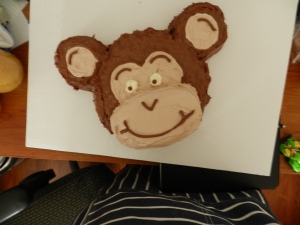
Since he goes by Monkey, (a nickname I am sure he will grow to hate) I decided on a monkey cake. Looking on-line I established there are some parents out there that REALLY love their kids and that are REALLY creative. WAYYYYY more creative than I am. Some people did these huge, full sitting, eating banana, swinging from vine, monkeys. Ok, back to basics.
I decided to scale down, stick with just a monkey face. There were a few design idea to choose from. One style was made from filling a bowl with batter and baking it or filling a bundt pan with batter. After baking, it got inverted and decorated. This seemed to be potentially fatal to me. How could you be 100% certain the cake was done all the way through? What if it didn’t rise enough and you didn’t have enough room to decorate a face on the side? No, this idea was out. On to Plan B.
I made two boxes of cake mix, one white, one chocolate. I made them in standard 9-inch round layer pans, so I ended up with 4 layers. I figured if I screwed something up with two layers, I had two more layers to make a standard cake from(see, nothing like being prepared for disaster!). Using one layer as my base, I cut an oval shape and two rounds out of another layer. Placing them on the cake board with the first round I noticed something. It is only a few inches of ear placement between having a monkey cake and a mouse cake. See below if you don’t believe me…..Curious George or Mickey Mouse, it’s a fine line.
After getting the right placement, I started in on icing and decorating. I used store bought icing and let me tell you why. I think since boxed cake mix is so much softer cake than homemade, you need a really soft, pliable icing to work with, so you don’t tear the cake every time you move your spreader. At least that is what I have found works for me. So here we go.
I bought white and chocolate frosting. To make the tan color I used for the ears and nose/mouth section, I took some of the white frosting in a bowl and mixed in some chocolate. I was thrilled with the color! It was nicely tan but not to dark and looked good with the chocolate. I used a piping tip to outline the areas I wanted to fill in with the tan frosting, then loosely filled in with squiggles of frosting. Using an offset spatula, I spread the frosting squiggles to fill in the rest. As for the mouth area, I carefully frosted it with my spatula. Then came the chocolate frosting, which went the same way, frosting the sides heavily as I went. The only difference with the chocolate was I tried to lift up on the spatula a little to make it look like animal hair a little bit. Not sure if it worked but it made me feel crafty!
Once all this was done, I got out the decorating tool from Pampered Chef(Thanks to Theresa Garner who has yet to ask for it back! I use it all the time!) and got to work! Filled with chocolate frosting, I piped on the mouth, highlighted the ears, and the nose. Spooning on white for the eyes, I piped on the pupils and monkey was done.
I tinted the rest of the white frosting green and spread it out over the board in a thin layer, piped on some squiggle lines, and sprinkled on some green sparkle sugar. A 1 candle and it was done!
As for the other layers, I made them into a layer cake with the leftover frosting and it worked out well for the adults at his party.
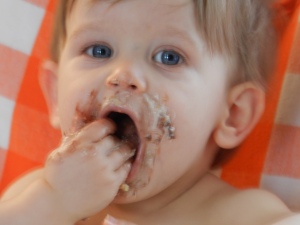
As you can see, he had no problem enjoying it! He dug right in a needed a bath before opening his presents! Happy Birthday to my Baby Monkey!


Congratulations!!! It looks wonderful. For someone who doesn’t bake you did a tremendous job!!!
Very Cute!!!
That’s a great cake! I love it. I’m sure he did too.